In this guide, we’ll show you how to customize your WooCommerce thank you page, no plugins required! Just some good old-fashioned manual tweaks to make it work for your brand. Whether you want to add a personal touch, boost sales, or keep customers coming back, we’ve got you covered.
Your customer just made a purchase—great! But before you move on, ask yourself: Is your thank you page just a generic confirmation message, or a powerful tool to drive more sales and engagement?
Most online stores overlook this page, but here’s the reality—it’s one of the most valuable moments in the buyer’s journey! Your customer is engaged, excited, and already trusts your brand enough to make a purchase. This is the perfect time to showcase frequently bought together products, promote exclusive deals, and even grow your subscriber list with a well-placed opt-in form.
By customizing your WooCommerce thank you page, you can do more than just say, “Thanks for your order!” Add custom add-to-cart links to encourage repeat purchases. Because of such reasons, WooCommerce is a must-have e-commerce plugin to enhance their shopping experience.
Table of Contents
Why Customize the Thank You Page?
Customizing the WooCommerce thank you page creates a more engaging post-purchase experience for your customers. A well-designed thank you page does more than just confirm an order—it enhances customer satisfaction, encourages repeat business, and strengthens brand loyalty. Here are some key benefits of making these customizations:
✅ Enhanced Customer Experience
A default thank you page provides minimal information, but when you customize WooCommerce thank you page, you can offer additional value to customers. For example, including delivery estimates, order tracking links, or product usage guides ensures that customers have all the information they need immediately after purchase. This proactive approach reduces post-purchase confusion and enhances overall satisfaction.
✅ Increased Sales Opportunities
Your thank you page is a great place to upsell and cross-sell products. By displaying related products, exclusive discounts, or limited-time offers, you can encourage customers to make additional purchases. A strategically designed thank you page can turn a single purchase into a long-term customer relationship, boosting your revenue in the process.

✅ Stronger Brand Reinforcement
A personalized thank you page helps differentiate your brand from competitors. Adding your logo, brand colors, and a warm, customized message strengthens your brand identity. You can also include customer testimonials, social media links, or referral program details to further engage buyers. When you customize WooCommerce thank you page, you leave a lasting impression that fosters trust and loyalty.
Customize Your WooCommerce Thank You Page
Customizing the WooCommerce Thank You page allows you to enhance user experience, promote upsells, and track conversions. By default, WooCommerce provides a generic order confirmation page, but you can modify it to boost engagement and drive more sales.
WooCommerce uses the thankyou.php template to display the thank you page. By creating a custom version of this template, you can modify its content and layout.

If you’ve already crafted a custom thank you page, this simple method ensures your shoppers land there instead of the standard WooCommerce default. It’s a quick way to elevate your post-purchase game and showcase your brand’s unique flair. Here’s how to make it happen in just a few clicks:
Step 1: Head to Your WordPress Dashboard
Log in and navigate to WooCommerce, then click on Settings. This is your control center for all things store-related!
Scroll down the settings menu and select the Advanced tab to unlock more customization options.
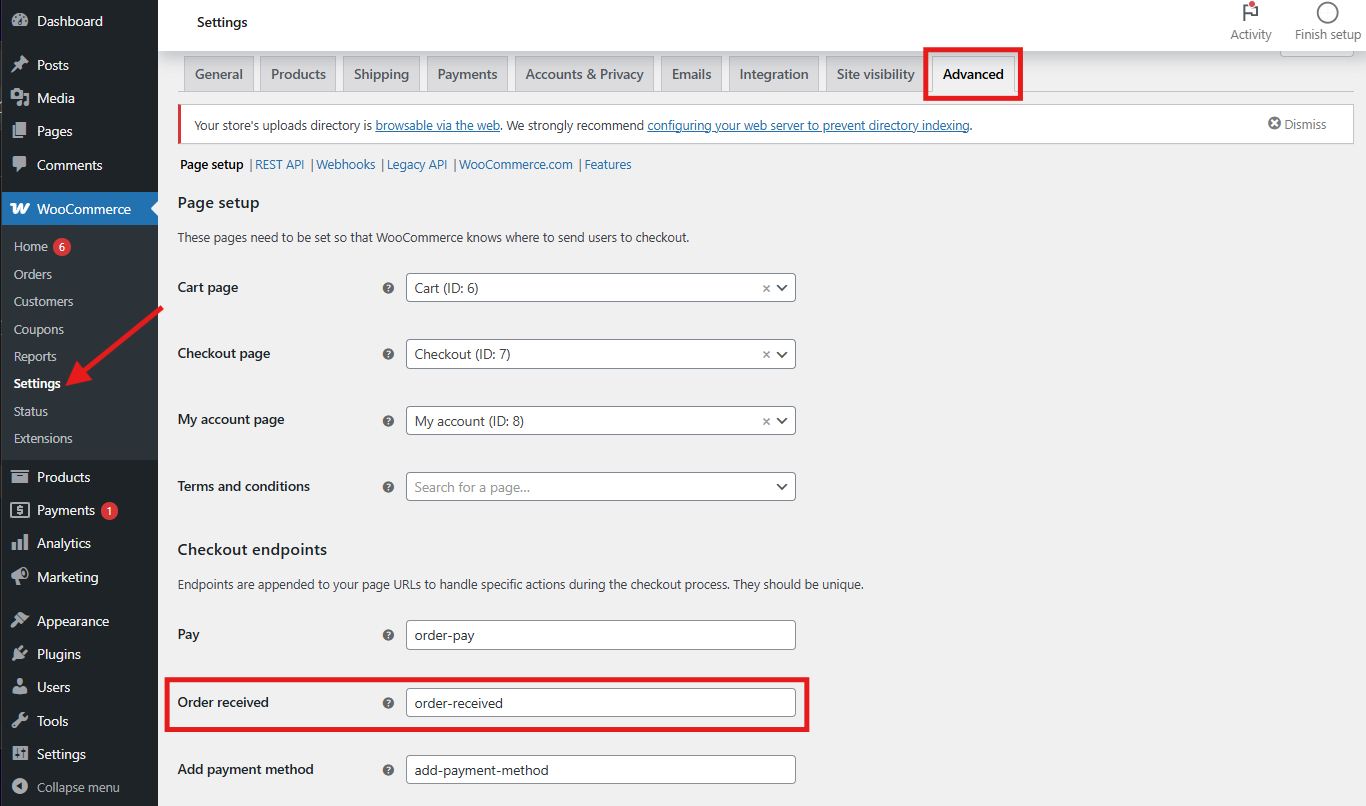
Look for the Checkout Endpoints section. This is where you’ll tweak the customer journey using Order Received Page, because it is where our thank you message is visible after purchase is completed. This is the template you need to look for in your design WordPress editor.
Step 2: WordPress Template Editor
From your WordPress menu, find Appearance > Editor. You will be navigated to Design Editor where you can use the WordPress block editor to edit customize your Thankyou Page.

Step 3: Customizing Thank you Page Template
Now, from Design menu navigate to Templates > Order Confirmation

Here you can add and edit all the contents for the Thankyou Page template! We are adding this “💥Keep on Shopping with Our Store to Avail Best Offers💥” to our template:
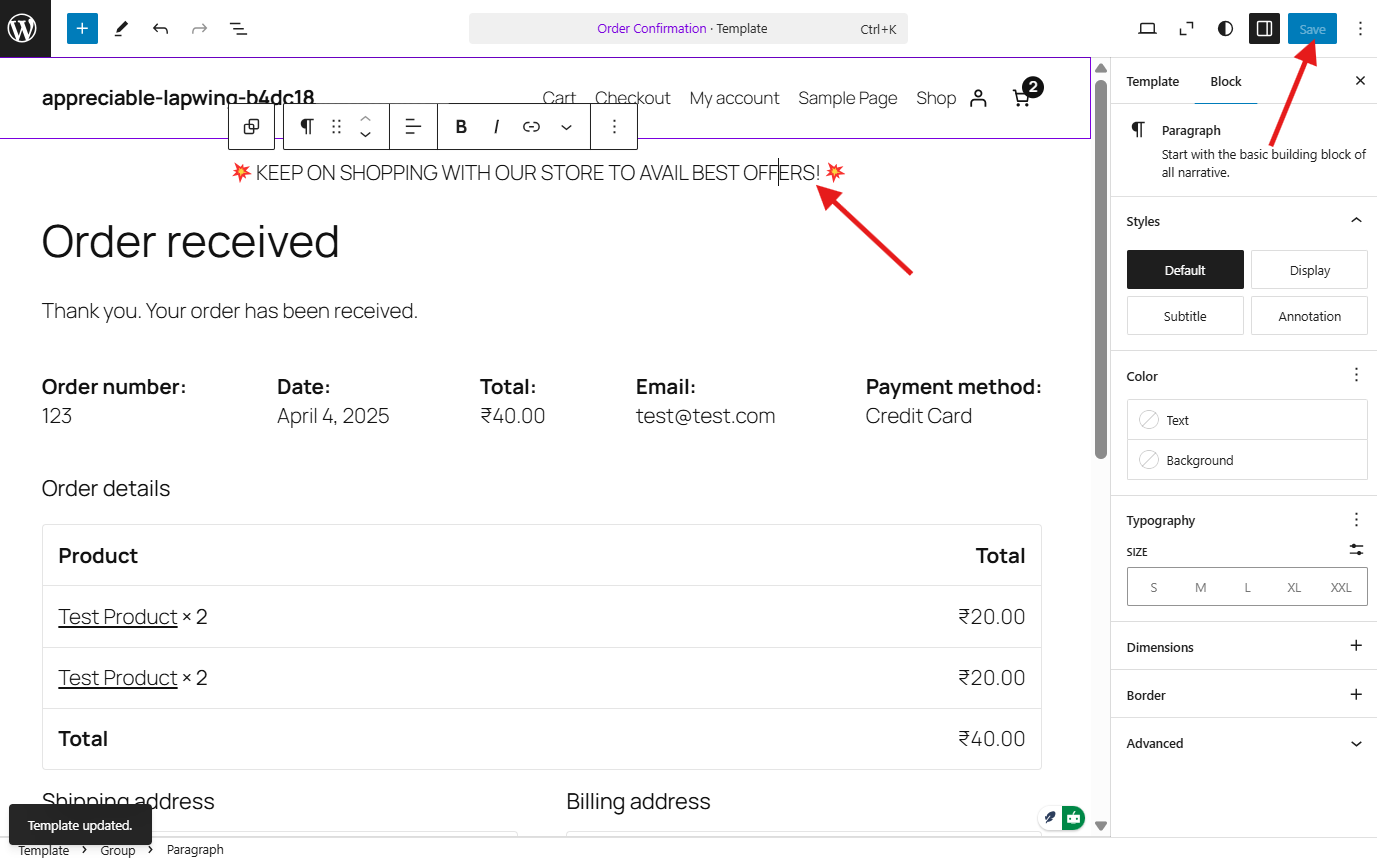
Step 4: Save Changes
Click Save Changes, and you’re done.
Voilà! Now, every customer will be whisked away to your tailored thank you page after purchase. It’s a seamless way to customize your WooCommerce thank you page, delight shoppers, and keep them coming back for more!

Other Ways to Customize WooCommerce Thank You Page
✅ Design a Custom Thank You Page with Elementor
If you’re already using Elementor, you can easily craft a stylish Thank You page that feels on-brand and customer-focused.
Here’s how to do it:
- Create a New Page in WordPress and open it with Elementor.
- Add Dynamic Widgets like the customer’s name, order number, order summary, and email address.
- Use Visual Elements like icons, testimonial sliders, or even a short “Thank You” video to create a memorable experience.
- Redirect Customers to this custom page using a plugin like Thank You Page Customizer or with custom code.
💡 Pro tip: Adding a personalized message or a discount code for their next order boosts engagement.
✅ Use WooCommerce Thank You Page Plugins
You don’t need to write code or use a page builder to customize the Thank You page. Several plugins can handle this for you, with drag-and-drop simplicity.
Popular plugins to try:
- NextMove Lite – WooCommerce Thank You Page Customizer
Add smart sections like recommended products, social sharing buttons, dynamic coupons, or even order tracking. - YITH Custom Thank You Page
Redirect users to different pages depending on the products they buy. Great for cross-selling or offering free downloads. - FunnelKit (Formerly WooFunnels)
Build powerful Thank You pages with templates and smart widgets. You can also A/B test designs to see what works best.
These tools are great for store owners who want flexibility and speed without touching a single line of code.
✅ Customize Thank You Page with Code (For Developers)
If you prefer full control, you can override the default WooCommerce Thank You page template using PHP.
Steps:
- Copy the
thankyou.phpfile from:wp-content/plugins/woocommerce/templates/checkout/ - Paste it into your child theme at:
wp-content/themes/your-theme/woocommerce/checkout/ - Modify the content inside this file—add text, reorder sections, or inject custom logic like upsell recommendations.
- For more advanced logic, hook into
woocommerce_thankyouvia your theme’sfunctions.phpfile.
add_action('woocommerce_thankyou', 'custom_thank_you_logic', 10, 1);
function custom_thank_you_logic($order_id) {
    // Add your custom code here
}
This method is best if you’re building a custom WooCommerce experience.
Best Practices for Customizing Your WooCommerce Thank You Page
Ready to transform your WooCommerce thank you page into a customer-winning masterpiece? Before you dive in, let’s talk about the must-do steps to ensure everything goes off without a hitch. These best practices will help you customize your WooCommerce thank you page like a pro, delivering a flawless experience that keeps your store shining. Let’s get started!
1️⃣ Back Up Like Your Business Depends on It (Because It Does!)
Picture this: You’re about to customize your WooCommerce thank you page, and—oops—something goes sideways. No worries, though, because you’ve got a backup, right?
Before you tweak a single line of code, make a full backup of your site. It’s your safety net! If anything funky happens while you customize your WooCommerce thank you page, you can hit “restore” and bring everything back to normal—no data lost, no stress added.
Check out the Best WordPress Backup Plugins
Grab all your files and export your database manually, or lean on your hosting provider’s slick backup tools.
Pro tip: Don’t just back up for this project—make it a habit! It’s the ultimate shield against chaos when you customize your WooCommerce thank you page.
2️⃣ Test It ‘Til It’s Perfect
You’ve just finished tweaking your thank you page—congrats! But hold the champagne. It’s time to test, test, and test again.
When you customize your WooCommerce thank you page, you’ve got to make sure it’s running like a dream. Place a few test orders to see if your custom messages pop up, your related products dazzle, and those sweet discount codes display just right.
Don’t stop there—check it on your phone, tablet, and desktop. Does it look as good on mobile as it does on your laptop? If something’s off, fix it before your customers notice. Thorough testing ensures a silky-smooth experience when you customize your WooCommerce thank you page, keeping your revenue flowing and your shoppers smiling.
3️⃣ Play It Safe with a Staging Site
Here’s a golden rule: Never mess with your live site until you’re 100% sure it works. That’s where a staging environment swoops in to save the day!

Think of it as a sandbox—a perfect clone of your store where you can experiment and customize your WooCommerce thank you page without risking a single sale. Most hosting providers offer staging setups, or you can go full DIY with a local development site like InstaWP.
Tweak, test, and perfect everything there first. Once it’s a total win, push it live with confidence. This way, you can customize your WooCommerce thank you page without ever interrupting your customers’ shopping spree. Genius, right?
Redirect to Unique Thank You Pages (Per Product or Category) 🔀
Want to send customers to different Thank You pages based on what they buy?
You can achieve this using conditional logic in your functions file or by using plugins like:
- WooCommerce Redirect Thank You (lightweight plugin)
- Custom
woocommerce_thankyouhook withwp_redirect()based on product/category
Example Use Cases:
- Deliver digital downloads instantly
- Send buyers of a premium product to a bonus offer page
- Redirect wholesale buyers to a B2B message
This is perfect for segmentation and personalized post-purchase flows.
What to Include in a High-Converting Thank You Page 🧠
No matter how you build your Thank You page, here are some proven elements to include:
✅ Personalized message (“Thanks [First Name], your order is confirmed!”)
✅ Order summary with product images and pricing
✅ Next steps (e.g., estimated delivery date, shipping updates)
✅ Special offer or coupon for future purchases
✅ Social sharing buttons or referral programs
✅ Customer support info (FAQs or live chat link)
A well-designed Thank You page isn’t just polite—it’s a powerful place to build trust, drive repeat purchases, and reduce post-purchase anxiety.
FAQS
What is the WooCommerce Thank You page?
The WooCommerce Thank You page, also known as the Order Confirmation page, is the page customers see right after completing a purchase. It confirms their order details and provides a chance to engage further, like offering upsells or thanking them for shopping.
How does the Site Editor method work for customizing the Thank You page?
The Site Editor method lets you customize the WooCommerce Thank You page using WordPress’s full site editing features. You simply go to Appearance > Editor > Templates > Order Confirmation in your dashboard and edit the page layout visually—no coding required.
Do I need to know how to code to use the Site Editor method?
No, you don’t need coding skills! The Site Editor uses blocks just like the regular WordPress block editor, so it’s easy for beginners to add text, images, buttons, and more to customize the Thank You page.
Wrap It Up: Make Your Thank You Page Unforgettable!
| Method | Ease of Use | Customization Level | Tools/Plugins Needed | Best For |
|---|---|---|---|---|
| Site Editor Method (FSE Template) | ⭐⭐⭐⭐⭐ | Medium to High | WordPress Site Editor (Block Theme) | Beginners using block themes |
| Elementor Page Builder | ⭐⭐⭐⭐ | Medium | Elementor + Redirect Plugin | Designers & Visual Editors |
| Plugins (NextMove, FunnelKit) | ⭐⭐⭐⭐⭐ | High | NextMove Lite, FunnelKit, YITH | Non-tech Store Owners |
| Custom PHP Template Override | ⭐⭐ | Very High | No plugin – theme file override | Developers & Agencies |
| Redirect to Custom Thank You Page | ⭐⭐⭐ | Medium | Custom Code or Redirect Plugin | Targeted Flows & Campaigns |
| Basic Method (Using Hooks) | ⭐⭐⭐ | Low to Medium | No plugin – edit functions.php | Beginners with light coding skills |
And there you have it, folks! Customizing your WooCommerce thank you page isn’t just about slapping on a new look—it’s about turning a basic “order confirmed” into a jaw-dropping moment your customers won’t forget.
Imagine this: You sprinkle in a heartfelt message, toss in some killer product recommendations, or drop an exclusive discount code. Suddenly, you’re not just saying “thanks”—you’re sparking excitement and begging them to come back for more! A killer thank you page can skyrocket sales, lock in loyalty, and make your brand the one they can’t stop talking about.
Here’s the truth: The post-purchase vibe matters just as much as the sale itself. Don’t let your thank you page be a snooze-fest—turn it into a springboard for epic customer connections. Whether you’re aiming to wow shoppers, pump up conversions, or let your brand’s personality shine, it all starts when you customize your WooCommerce thank you page.
So, what’s holding you back? Grab these tips, roll up your sleeves, and start crafting a thank you page that’s as awesome as your store. Your customers deserve it—and your bottom line will thank you! Let’s do this! 🚀